It began with the goal of providing mom with a decent box for internet & email. I’ve been collecting of old PC hardware to assemble with some of my own relics. From my old rig that once roared, an Athlon64 3200+ CPU, a K8N-E Deluxe motherboard, a Radeon 9800 pro graphics card, 2GB of ramsink’d DDR400 RAM, and a SATA 300gb drive. For the case, an Antec EarthWatts 430 PSU and an Antec Performance Plus 660, a solid steel tank.
A blast from the past, all that I still needed was a CPU cooler. Socket 754 has been obsolete for years but I lucked out with a nice Zalman CNPS 8000 CPU cooler for cheap off Kijiji. Ironically I actually did want that cooler back when I used this system but could not afford/justify spending that much money on just a CPU cooler, and now mom gets it. She’s getting spoiled, I know, but mom deserves the best eh.
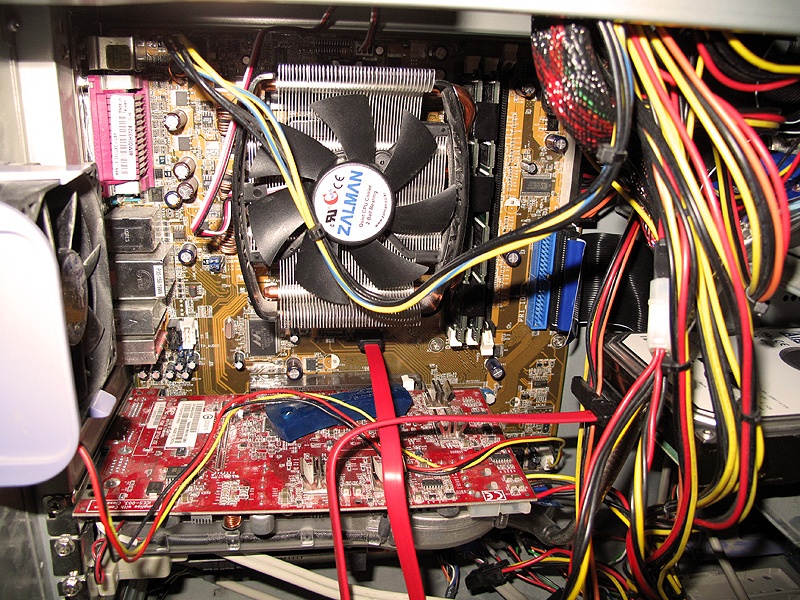
Now I’m ready to begin my Frankenstein. When I’m building PCs I like to do a practice run of placing the heatsink so that I’m prepared after I’ve spread the thermal paste. I find the Socket 754 heatsink mount a bit fiddly in general, and this was no exception. I don’t know if the cooler was supposed to be so tight, or whether it was just the way the heatsink mount was aligned with the cooler, but man did I have to wrestle hard to get it on, and then doubly so to get it back off. I apply the Arctic Silver 5 (awesome thermal paste), position the heatsink, and slam down the tension lever hard, not wanting to have shifting and smudge the even layer of thermal paste. A satisfying click and it’s in.
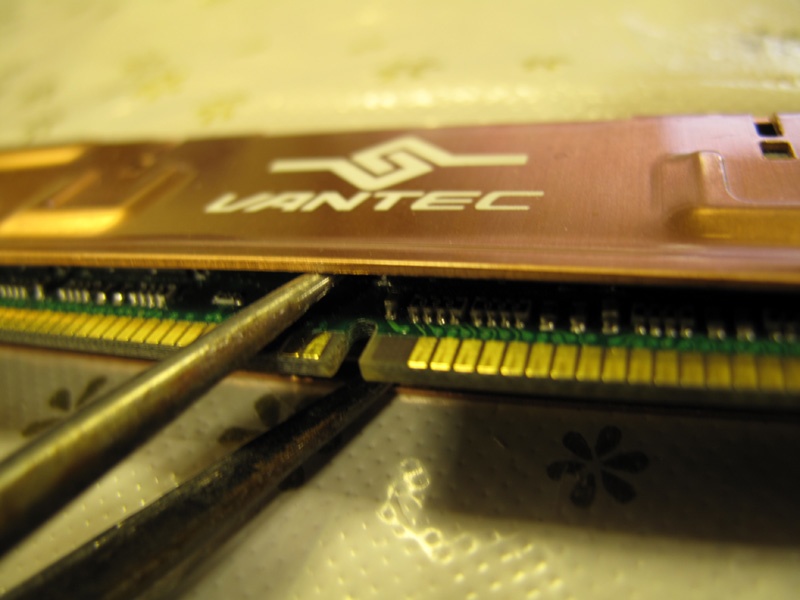
Now here’s the rub. The heatsink turns out to be VERY snug with the motherboard; the ram slots are a quite close. So close that there is barely a space between the first DIMM and the copper pipes. My RAM modules are all jacketed with ramsinks and cannot fit, so now I have to figure out how to remove the ramsinks. After bruising my fingers on trying to pry them apart and several failed attempts of using floss fed around as leverage, a brilliant idea occurs to me on how to pry apart the ramsinks – pliers! All that I need to do is insert the tips, delicately to not scratch the chips, and slowly expand them to separate the ramsinks from the module. It works!
I placed the modules back in their slots and just to be safe I brace that first DIMM with a bit of electrical tape, anchored to the second DIMM, to tug it slightly away from the heatpipes on the Zalman cooler.
That taken care of, I can now proceed with setting up the rest of the hardware. Of course, fitting the power control pins (Power, Reset, HDD light, etc) is a bitch. My P6T motherboard came with a block which you attach the pins to once and then unplug that when needed – I have never appreciated it more.
Now for the moment of truth, I press the power button. Nothing. I force the power cable in firmer and power on. Success! On to the Windows XP install. I place the CD in the tray and reboot. Guess what; the DVD-ROM is dead. Grumbling, I replace it and try again. Now we get somewhere.
Windows XP setup goes through the first phase, preparing the partition and copying the installer files to disk. The PC reboots, and the BIOS informs me that it was unable to find the disk. Huh? Windows can’t find the disk that it just copied all these files to? The disk that has been perfectly operational right up to when I started this shenanigan? Check the BIOS settings to make sure that the onboard SATA controller is properly configured (onboard SATA was new tech at the time), everything seems ok, except that it still can’t find the disk. Alright, so I dig up an 80gb drive, plug that in, try the install again. Lo and behold, it works! Begrudgingly I accept this as a temporary solution.
Windows boots, and I sit down to install the customary truckload of updates and service packs. Internet Explorer crashes every time I attempt the Windows Update. Incredibly frustrated, some quick forum reading reveals that Windows Update on Windows XP will now only work if ServicePack 3 is already installed. Well that’s nice; my distro includes SP2. Fortunately, the Service Packs are available as individual downloads from Microsoft so I grab it from the download center.
Once the updates and familiar software is installed, I figure that I might as well try my luck again with that troublesome harddrive again. The installer doesn’t want to work but there’s more than one way to skin a cat – Aomei Partition Assistant has a pretty good OS migration tool. Once the 80gb drive has been migrated to the 300gb drive that I want to use, I do the switcheroo and magically the system boots from the troublesome drive. Bingo!
The system up and running at long last, I do some diagnostics and discover that the RAM is running as DDR333, downclocked. Not DDR400 speed that it should be running at. Puzzled, I check the BIOS again, manually setting the timings and clock speed, but the motherboard ignores and overrides my settings! The nerve! No dice even with tweaking the voltage in case it was a stability issue. This one really stumped me but thank goodness for forums. I learn that it’s a bug in the more recent BIOS versions and that I need to downgrade. Sure, why not. The poster knew their shiz, BIOS revision 1006 worked for me.
So there it it at last, a geriatric system nursed to health by my loving hands. With all that trouble, you bet I 3Dmarked it: a whooping 6780 in 3DMark 2003. Not bad, not shabby at all.